|
These instructions assume that your Multiple Listing Service account is setup to export data for use with this product. NOTE: If your MLS is setup for use with Redstone or CompCruncher, the same export format will work with the new ClickFORMS MLS Import Wizard. If you need assistance to setup your MLS, please call 800-622-8727.
|
Setting up ClickFORMS to use the NEW Automated ClickFORMS MLS Import Wizard
|
| Veteran ClickFORMS users who have used the Data Import wizard before 2019 will have the Manual Data Mapping set by default and will need to follow these instructions. |
|
If you are new to ClickFORMS and have never used the MLS Import Wizard, then you can proceed to the next step by clicking "Importing MLS Data into your Report" below. |
Converting ClickFORMS to use the NEW MLS Import Wizard
|
- The ClickFORMS MLS Import Wizard requires the Automated Data Mapping" option. To change this option, click on the "Edit" tab from the main menu, then select "Preferences". This step will need to be completed on all devices using ClickFORMS.
|
 |
- Scroll the left column to the Tools heading and click "Built-In".
|
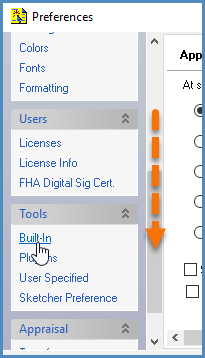 |
- From the right side of the window, scroll to the bottom until you see the "Data Import Wizard" radio button
box. Select the "Use automated data mapping" radio button. Click the "Apply" button, then click "OK".
|
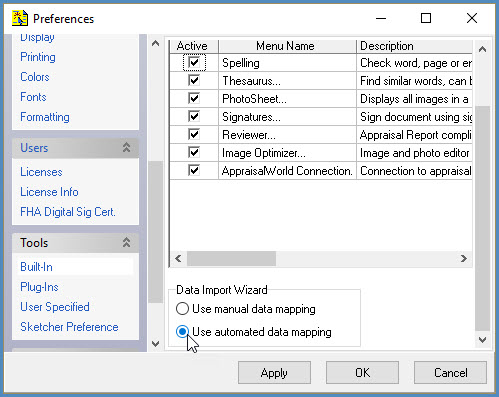 |
| Your ClickFORMS software is now setup to use the new ClickFORMS Data Import Wizard.
|
|
|
|
Importing MLS Data Into Your Report
|
| To use the Data Import Wizard, you must first export a .CSV, .TXT or .TSV file from your MLS of the comparables you want to use in your report. This export file should be saved on your computer. You may save your MLS Export file to: Documents/My ClickFORMS/MLS Imports folder. However, you may save your file to another location on your hard drive or a cloud storage account such as Dropbox, as long as you know where to browse to locate your exported file.
|
-
In ClickFORMS, open your report or template that you will be using to import your data.
IMPORTANT: Include the number of necessary Sold and Listing Comp forms necessary to complete your appraisal report.
The ClickFORMS Data Import Wizard will not work unless you have a report or template open with the necessary sold or listing forms included before using this service. The number of Sold/Listing comps will determine the number of sales/listing you will be able to import into the sales/listing grids on the report.
|
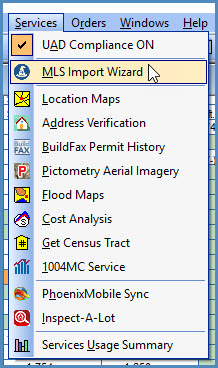
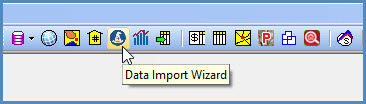
- There are a few different ways to launch the MLS Import Wizard in ClickFORMS.
Option 1: From the main ClickFORMS menu click on Services, then select From the main ClickFORMS menu click on Services, then select MLS Import Wizard.
Option 2: If you have the "Workflow Toolbar" (View → Tool Bars → Show/Hide Toolbars → Workflow Toolbar) visible, simply click the MLS Import Wizard icon.
|
 |
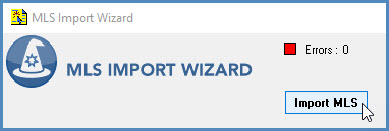
- At the top-left of the MLS Import Wizard screen, click on the Import MLS button.
|
 |
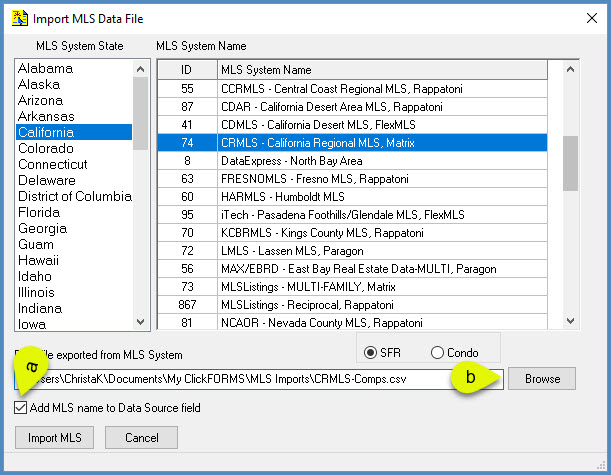
- If this is your first time importing MLS Data into ClickFORMS, you will need to select your state from the left column, then select your MLS system name from the right column. Names are in alphabetical order.
- If you wish to add your abbreviated MLS name to the Data Source Field in your sales/listing gride in lieu of MLS#, click the "Add MLS name to Data Source field" box. Only the abbreviated characters preceeding the (–) dash shown in your MLS system name list will appear in your sales/listing grid.
- Click the "Browse" button to locate your MLS data file. Double-click your data file. The MLS Import Wizard will begin processing your data.
|
|
 |
|
MLS Import Wizard Grid – Overview
|
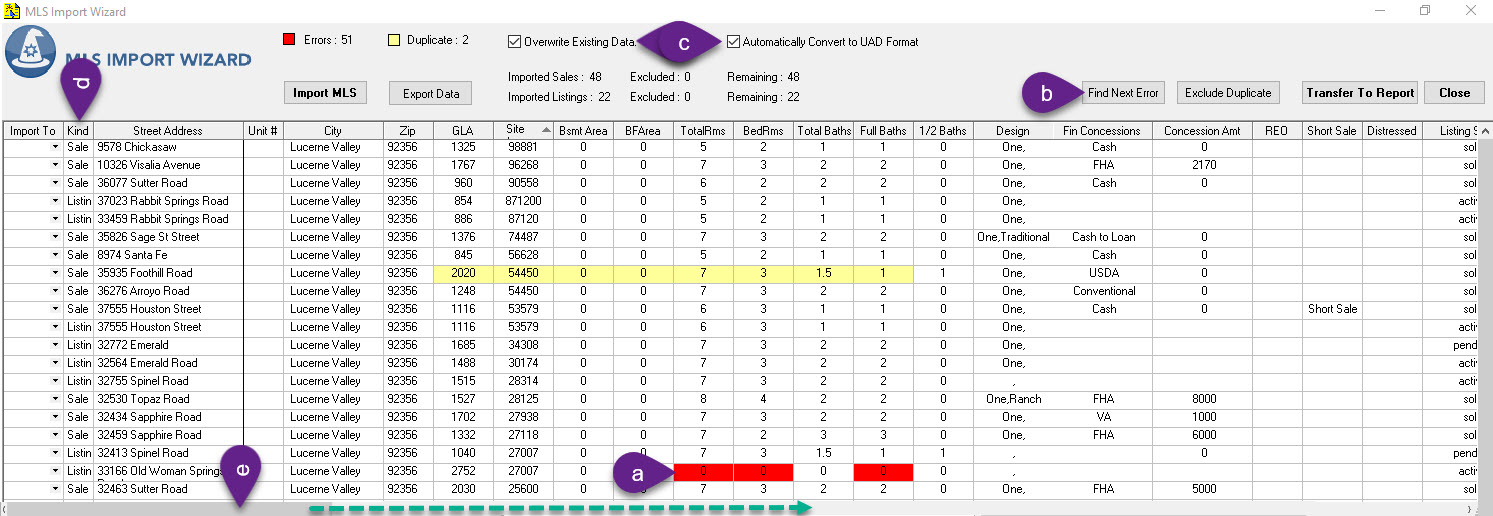
| Your data is now in the MLS Import Wizard Grid. Here, you have control over how the data will be transferred into your report. First, here is a quick overview:
|
- The red box indicates how many errors ClickFORMS found in your MLS data. You will be able to correct any errors simply by typing over the data before transferring the data into your report, or you may correct the errors within the ClickFORMS report.
- Click the "Find Next Error" button to go directly to the next error found in the grid.
- These check boxes allow you to Overwrite your existing data in your report or if unchecked, append additional data into your report. Leave the "Automatically Convert to UAD Format" checked to convert your data into UAD format when transferring to your report. You may uncheck this box if UAD format is not needed.
- This column tells you if the record is a Listing (Active or Pending) or a Sold record.
- The bottom-horizontal scroll bar lets you scroll left and right to see all of the MLS data you imported.
|
 |
Customizing MLS Data into UAD Data.
|
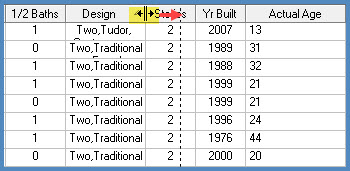
| The primary function of an MLS data bases is to sell properties. Therefore, listing agents may elevate their listings causing excess or incorrect data for appraisers when importing MLS data into their reports. The MLS Import Wizard let's you customize the Listing Agent's data to import based on the appraiser's personal preferences. We will use the Design field as a demostration.
|
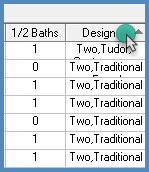
- Go to the Design column. This data column imports into your Design field in your report. Sort the column by clicking on the Design Header.
To see more of the data in the column, click the right side line of the header and drag to widen the column.
|
|
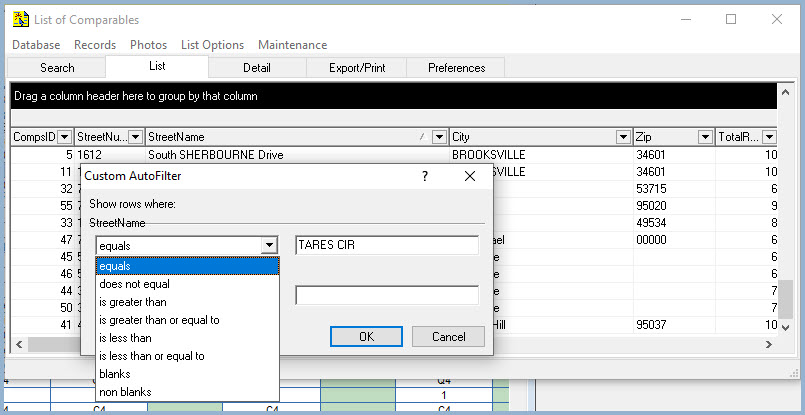
- The Custom AutoFilter window will open. Type in your search word in ALL CAPS (TARES CIR as example below), then click the OK button. In addition, you are able to select other search phrases other than 'equals'.
|
 |
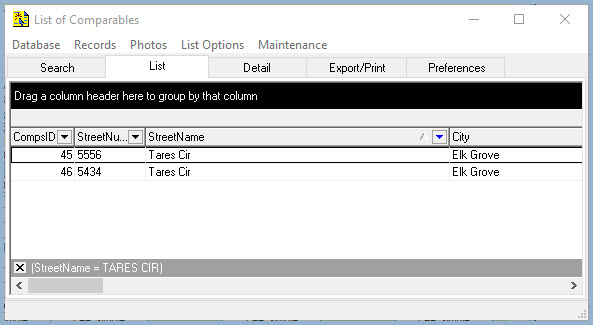
- The comparable record grid will now show only records that contain the search word.
|
 |
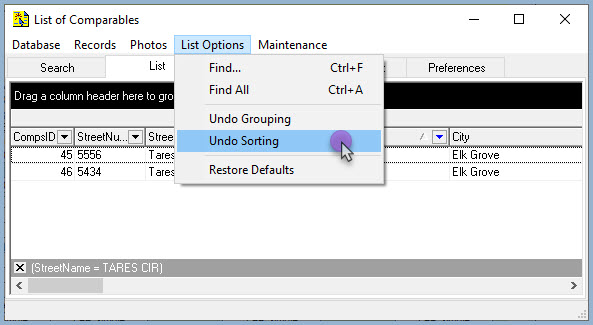
List Undo Sorting
|
-
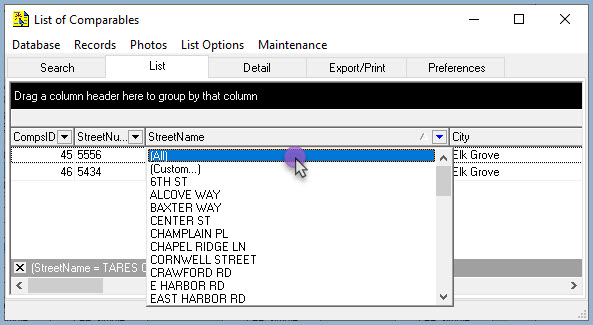
You can unsort your list by clicking the down-arrow in the column heading you wish to unsort to display the drop-down menu, then select [ALL]. Alternatively, you can click the List Options menu item and select Undo Sorting.
|
 |
 |