Importing MLS Data into Your Report
To use the Data Import Wizard, you must first export a .CSV, .TXT or .TSV file from your MLS of the comparables you want to use in your report. This export file will be saved on your computer. You may save your MLS Export file to: Documents/My ClickFORMS/MLS Imports folder. However, you may save your file to another location on your hard drive or a cloud storage account such as Dropbox. Make sure you know where to browse to locate your exported MLS file.
-
In ClickFORMS, open your report or template that you will be using to import your data.
Important: Include the number of necessary Sold and Listing Comp forms necessary to complete your appraisal report. The ClickFORMS Data Import Wizard will not work unless you have a report or template open with the necessary sold or listing grid forms included before using this service. The number of Sold/Listing comps will determine the number of sales/listing you will be able to import into the sales/listing grids on the report.
- There are two different ways to launch the MLS Import Wizard in ClickFORMS.
Option 1: From the main ClickFORMS menu click on Services, then select MLS Import Wizard.
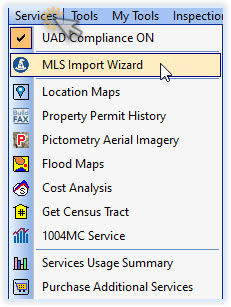
Option 2: If you have the "Workflow Toolbar" (View → Show Workflow Toolbar) visible, simply click the Import Wizard icon.

- At the top-left of the MLS Import Wizard screen, click on the Import MLS button.
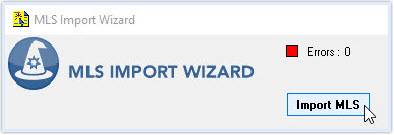
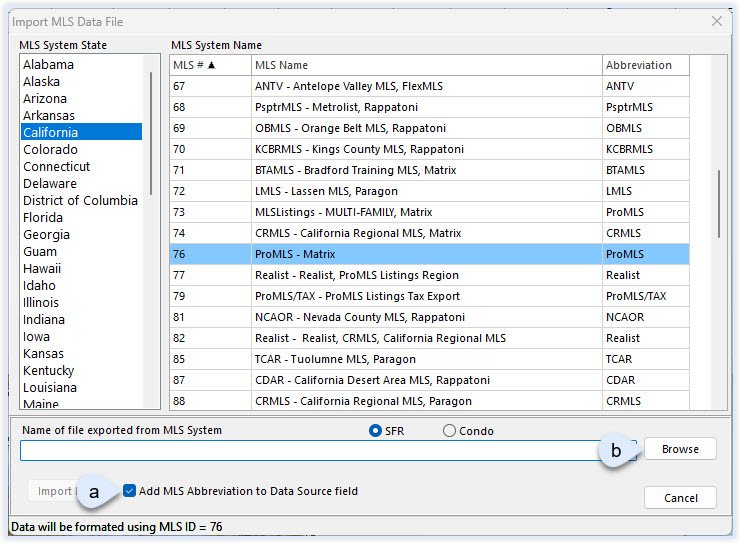
- If this is your first-time importing MLS Data into ClickFORMS, you will need to select your state from the left column, then select your MLS system name from the right column. By default, MLS names are in alphabetical order, you can sort by MLS # by clicking the MLS # header.
- If you wish to add your abbreviated MLS name to the Data Source Field in your sales/listing gride in lieu of MLS#, click the "Add MLS name to Data Source field" box. Only the abbreviated characters shown in the Abbreviation column will proceed your MLS#. The example below shows 'ProMLS' will show before your MLS number: ProMLS#CL7806548
-
Click the "Browse" button to locate your MLS data file. Double-click your data file. The MLS Import Wizard will begin processing your data. Do not click the Import MLS button.
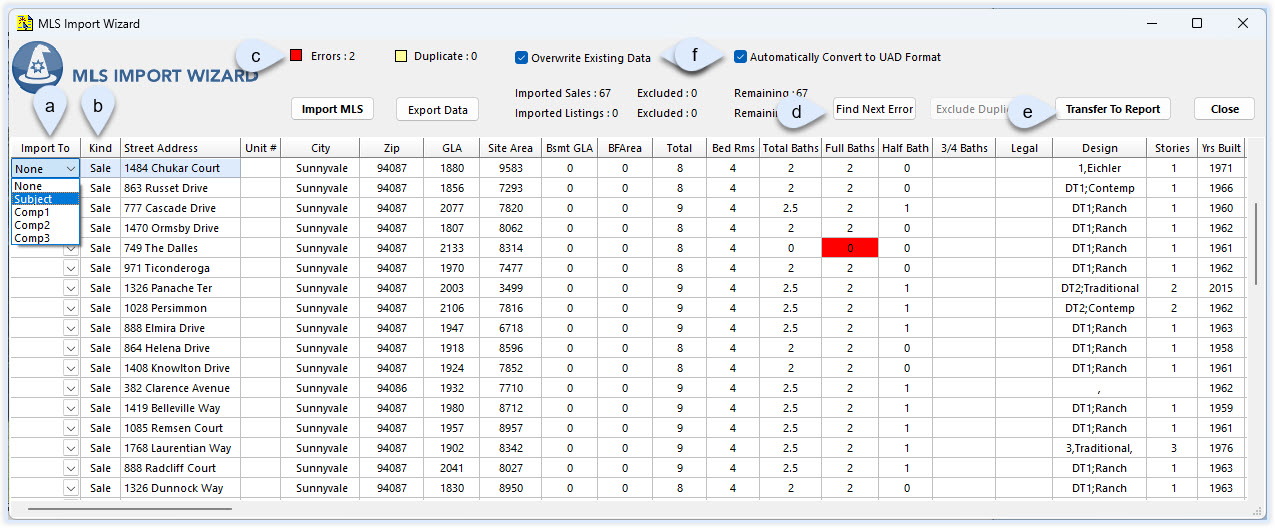
MLS Import Wizard Grid – Overview
Your data is now in the MLS Import Wizard Grid. Here, you have control over how the data will be displayed in your report. First, here is a quick overview:
- The Import To column lets you select your Subject Property and comps. Click on the drop-down menu to select where you want the property to appear in your Sales/Listing grid.
- The Kind column shows if the comp is a Listing (active/pending) or a Sale.
- Displays how many errors ClickFORMS found in your MLS data.
- You can find the errors by clicking the "Find Next Error" button. Errors are highlighted in Red in the MLS grid. You will be able to correct any errors simply by typing over the data before transferring the data into your report, or you may correct the errors within the ClickFORMS report.
- After you have assigned your comps to your Sales/Listing grid, click the "Transfer To Report" button. Your comps will be transferred. If you have a slow computer, this may take a minute. DO NOT CLICK the Import MLS button.
- The Overwrite Existing Data and Automatically Convert to UAD format checkboxes are for Redstone use only and have no effect in the ClickFORMS MLS Import Wizard.
Other Notes
• All columns are sortable by clicking on the column header.
• Use the bottom scroll bar to scroll left and right to see all the MLS data you imported.
Customizing MLS Data into UAD Data – Step-by-Step
The primary function of an MLS database is to sell properties. Therefore, listing agents may elevate their listings causing excess or incorrect data for appraisers when importing MLS data into their reports. The MLS Import Wizard lets you customize the Listing Agent's data to import based on the appraiser's personal preferences.
We will use the Design field as a demonstration.
- Go to the Design column. This data column imports into your Design field in your report.
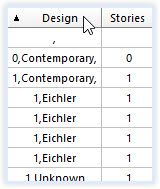
Sort the column by clicking on the Design Header.
Position your mouse over the right-side line of the header until you see the double arrows, click and drag your mouse right to widen the column.
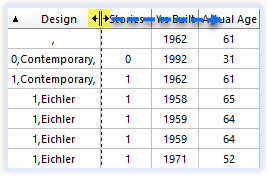
Design column widened to see all MLS data inputted by the Listing Agent.
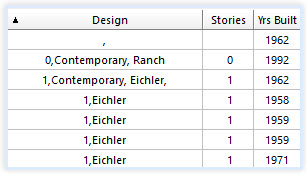
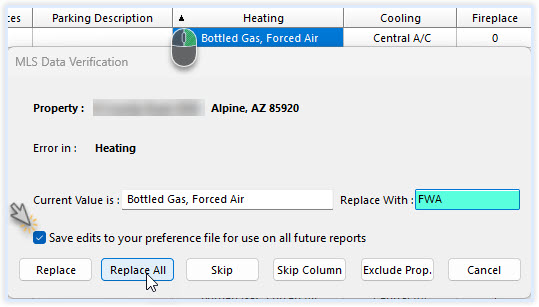
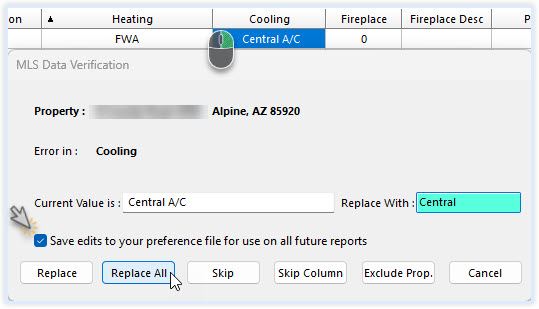
- The MLS Data Verification window lets you change the MLS data to your specifications. Some MLS systems are mapped so that a default UAD value may appear. For example, central, forced air heating may be pre-formatted to "FWA" and central air cooling may be pre-formatted to "Central". You may use something different in your appraisal reports. By right-clicking on the MLS data cell in the MLS Import Wizard, you can change the output for your reports.
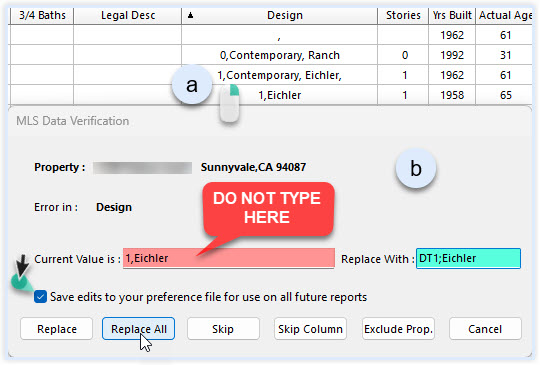
- In the Design column, Right-Click the data value you want to customize. In this example "One,Eichler" was right-clicked.
-
The MLS Data Verification window appears. Do not type in the "Current Value is:" field. This is MLS Data and should never be modified.
In the "Replace With:" field, type in your preferred (UAD) data phrase for your report.
Important: Check the box to "Save edits to your preference file for use on all future reports." Checking this box will save your edits for all new ClickFORMS reports. You will never have to edit that MLS data phrase again.
Do not check this box if you only want to make edits to the report you are working on, but do not want to save the edits for all future reports.
DO NOT make corrections in the MLS Import Wizard. You can correct typo's in the Preference File. The preference file is editable and discussed below at MLS Preference File – Correcting Errors.
-
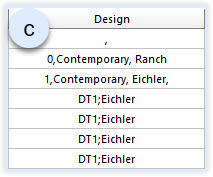
Here you see that all values of 1,Eichler was saved as DT1;Eichler
Customizing MLS Data into UAD Data – UAD Examples
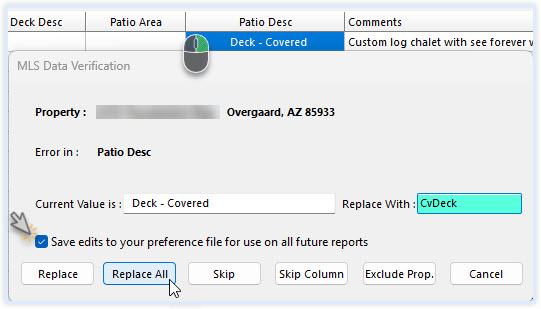
Some additional fields that can be customized are 'City', 'Design', 'Sales Concessions', Finance Concessions', 'View', 'Garage Description', 'Heating', 'Cooling', 'Patio Description', 'County' and 'State'. Make sure to have a report handy to see how you apply your UAD format, or you can use the images below as a reference.
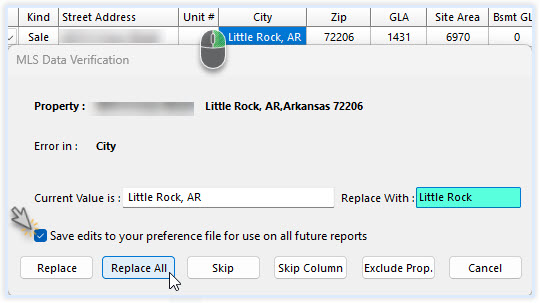
City - Normalize City Name
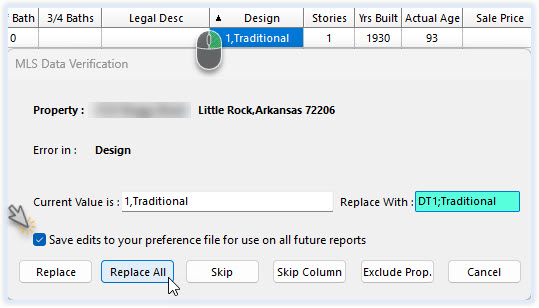
Design - Convert to UAD
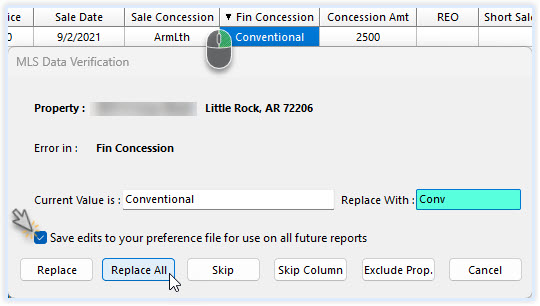
Finance Concessions - Abbreviate
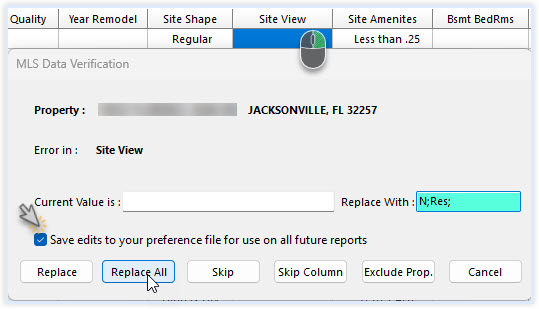
Site Views - Default Blank Columns
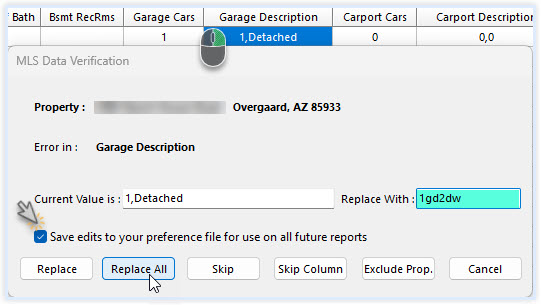
Garage Description - Convert to UAD
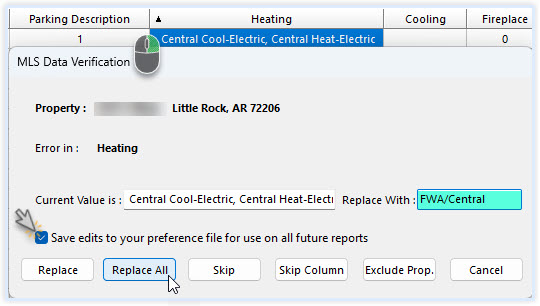
Important: Most MLS systems report the Heating and Cooling values in two separate columns. ClickFORMS will combine these fields and enter a '/' (Forward Slash), separating heating/cooling values when transferred to your report.
Some MLS Systems will report Heating and Cooling in one column and are only mapped to only the Heating column in the MLS Import Wizard. If this is the case for you, then insert the '/' between your custom Heating/Cooling UAD values. Refer to the Heating and Cooling images below:
Heating - Separate Column
Cooling - Separate Column
Heating/Cooling - One column combined
Patio Description - Deck, Patio, and Porch
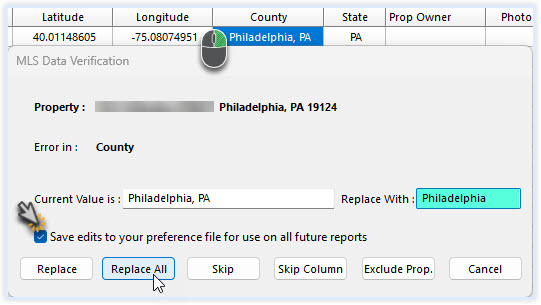
County – Normalize County
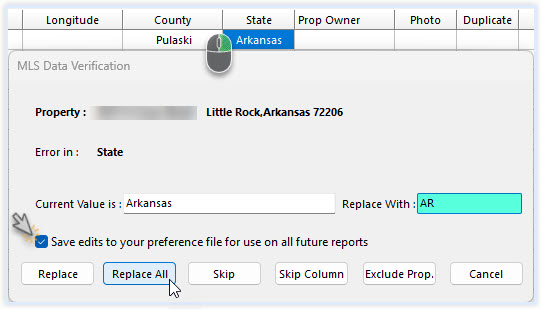
State - Abbreviate State
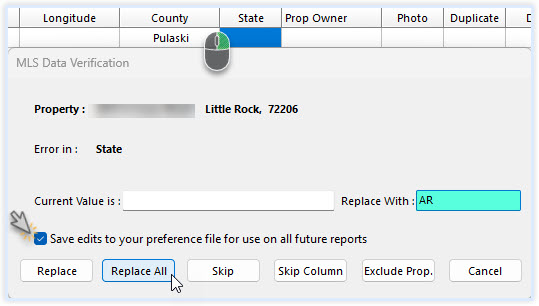
State - Blank
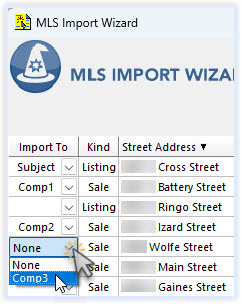
Selecting your Comparables
- From the 'Import To' column (left most column), click on the small drop-down arrow for your comparable address to assign the comp in your report, Subject, Listing1 or Comp1, etc. Continue to assign your comparables to your Sales/Listing grid.
- Transfer comparables to your Report
Click on the "Transfer to Report" button located on the top, far right of the MLS Data Review screen.
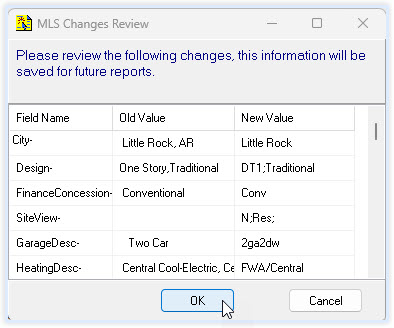
If you have made changes to the MLS Data, you will see a pop-up box asking you to Review your Changes. Click the OK button to save. Warning: If you do not transfer a property to your report, your custom changes will not be saved.
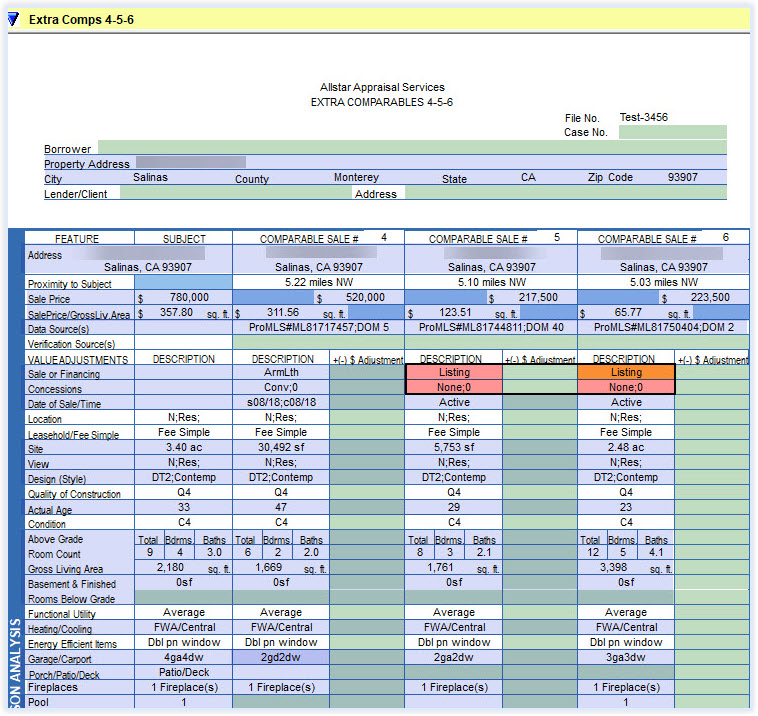
MLS Data that transfers into your Report
The image below displays the MLS data that is transferred in the blue highlighted fields . If you use a Template, add default descriptions for the unhighlighted fields for future use. For the Proximity to Subject fields, use the Location Map Service located in the Services menu.
MLS Preference File – Correcting Errors
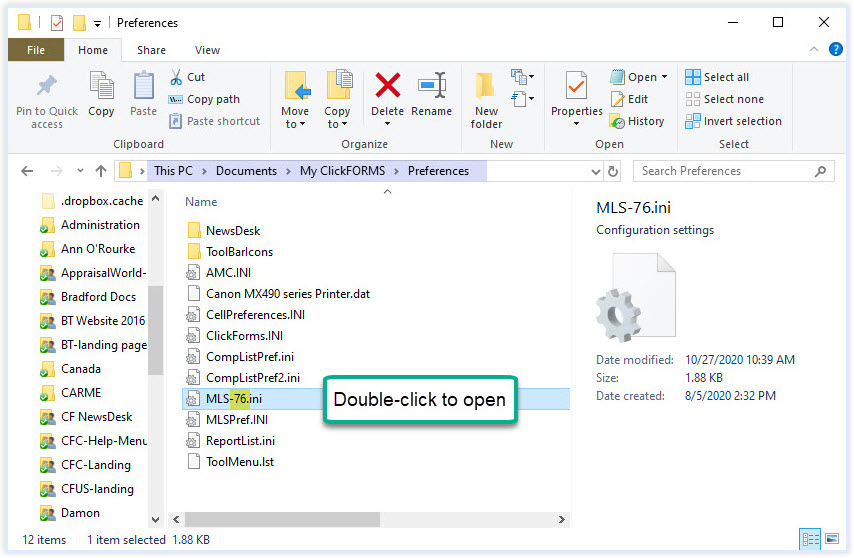
- Locate your MLS-###.ini file. This file is located in your My ClickFORMS/Preferences folder as shown below. If your My ClickFORMS folder is in the cloud such as OneDrive or DropBox, locate your My ClickFORMS/Preferences folder there.
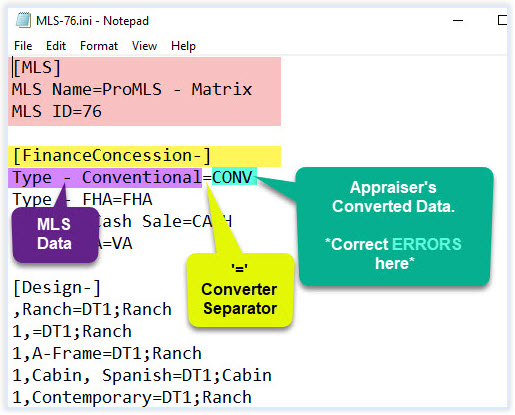
Your MLS-###.ini file will have a unique 1–4-digit number proceeding the 'MLS-' in the file name. MLS-76 is used as an example in the image below. Double-click the file to open in Notepad.
- Do not modify the top three lines of text. The ClickFORMS MLS Import Wizard will not recognize this file if modified.
• The Yellow highlighted text is the name of the [Field Header]
• The Purple highlighted text is the data values from your MLS system. Type – Conventional
• The '=' sign separates the MLS data from your custom value in the Wizard.
• The Green highlighted text can be corrected simply by typing in the correct, custom value. CONV
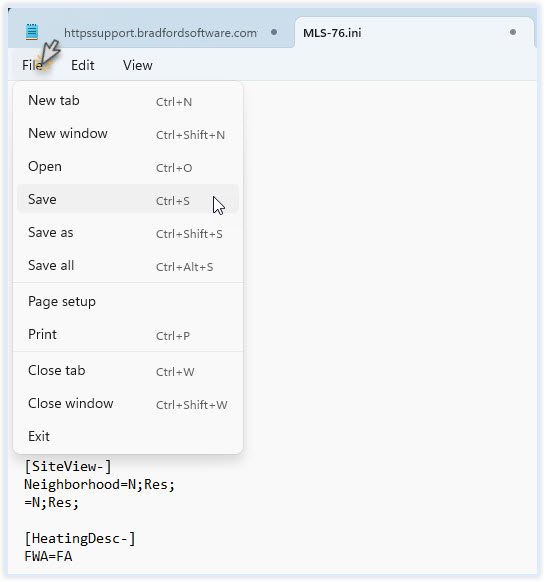
- Finish your corrections on the 'right' side of the '='. Click "File" from the upper left of the window and select Save. You have made your corrections and saved them to your preference file.
Setting up ClickFORMS to use the Automated ClickFORMS MLS Import Wizard
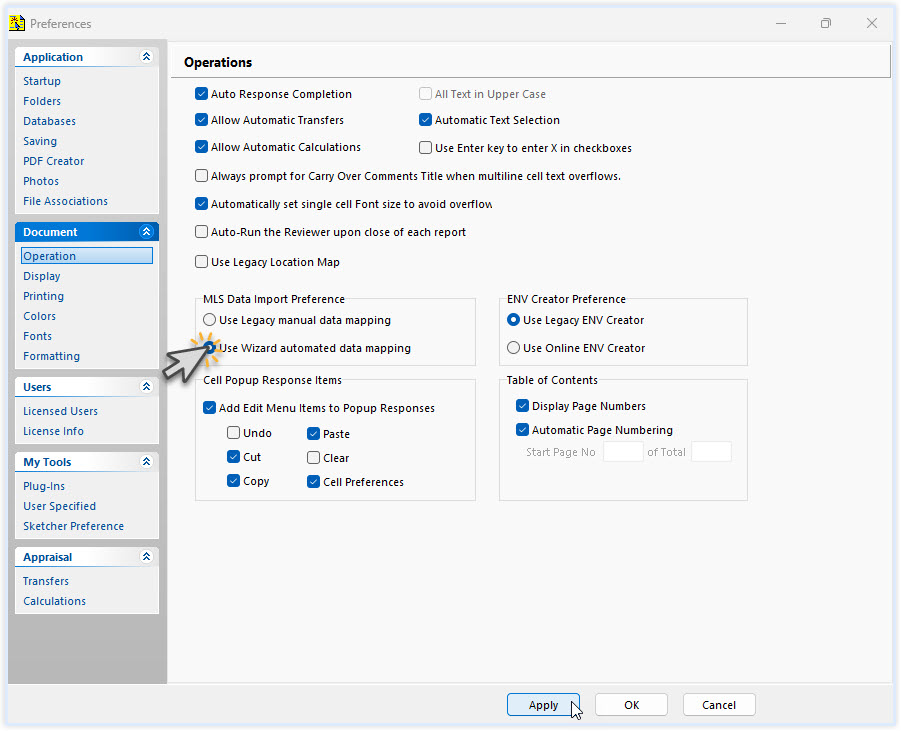
Veteran ClickFORMS users who have used the Data Import wizard before 2019 will have the Manual Data Mapping set by default and will need to follow these instructions to use the Automated MLS Import Wizard. This process will need to be completed on all computers using the Legacy MLS Data Import in ClickFORMS.
-
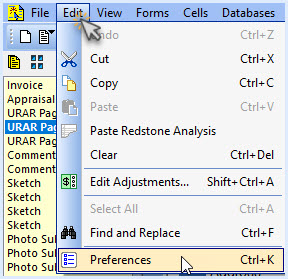
Click on the "Edit" tab from the main menu, then select "Preferences".
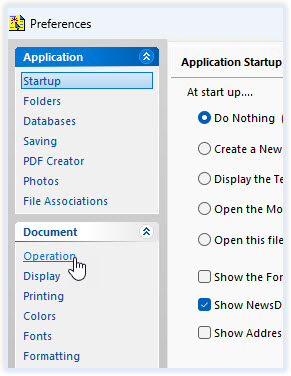
- Under the Document menu, click on "Operation".
- In the MLS Data Import Preference box, click the "Use Wizard automated data mapping" radio button, then click the "Apply" button. Click the "OK" button to close the window.
