Create a Location Map
|
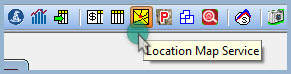
- There are a few different ways to launch the Location Map Service in ClickFORMS.
Option 1: From the main ClickFORMS menu click on Services, then select Location Maps.
Option 2: If you have the "Workflow Toolbar" (View → Tool Bars → Show/Hide Toolbars → Workflow Toolbar) visible, simply click the Location Map Service icon.
|

 |
- There are two ways to access the Deliver UAD Appraisal...
function.
|
Option 1: In ClickFORMS, click the File menu and select Deliver UAD Appraisal...
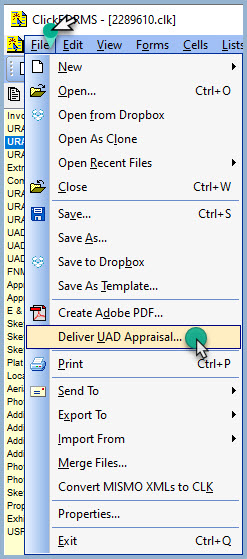 |
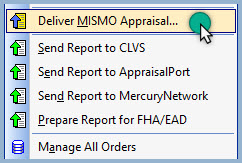
Option 2: In ClickFORMS, click the Order
menu and select Deliver UAD Appraisal...
 |
Non-UAD: In ClickFORMS, click either the File Menu or the Order
menu and select Deliver MISMO Appraisal...
 |
|
|
|
Check Comparable Consistency
|
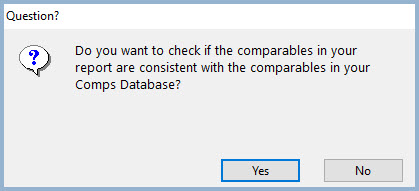
- You will be asked to check if the comparables in your report are consistent with the comparables in your Comps Database.
|
| If you have already checked your Comparable Consistency, click No to proceed.
|
| To check your Comparable Consistency, click Yes and follow the next steps.
|
 |
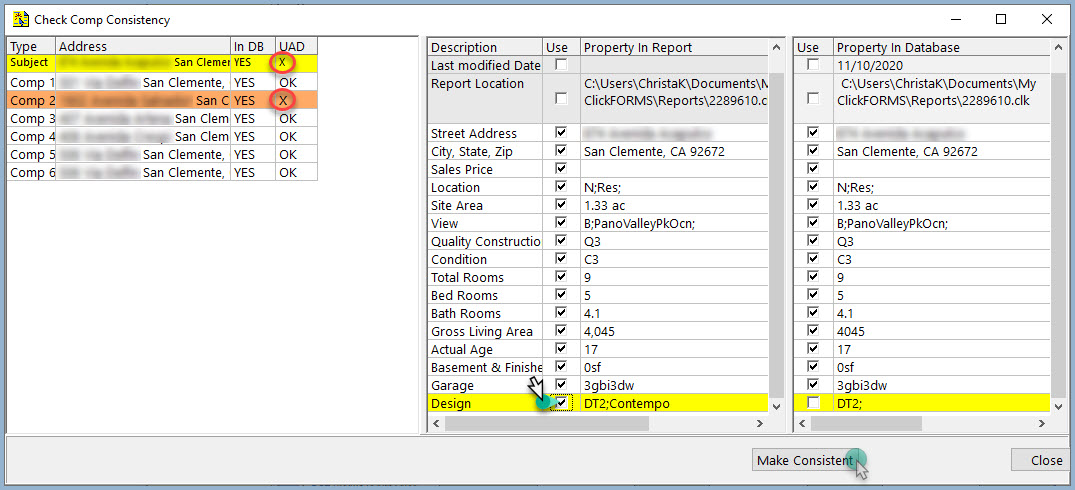
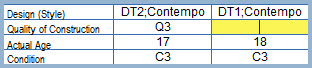
- In this example, the subject property has an inconsistency with the Comps Database. Click the correct check box option to use in your report and save to your comps database. The example below shows the correct selection for the "Design" field is DT2;Contempo. Click the "Make Consistent" button.
|
 |
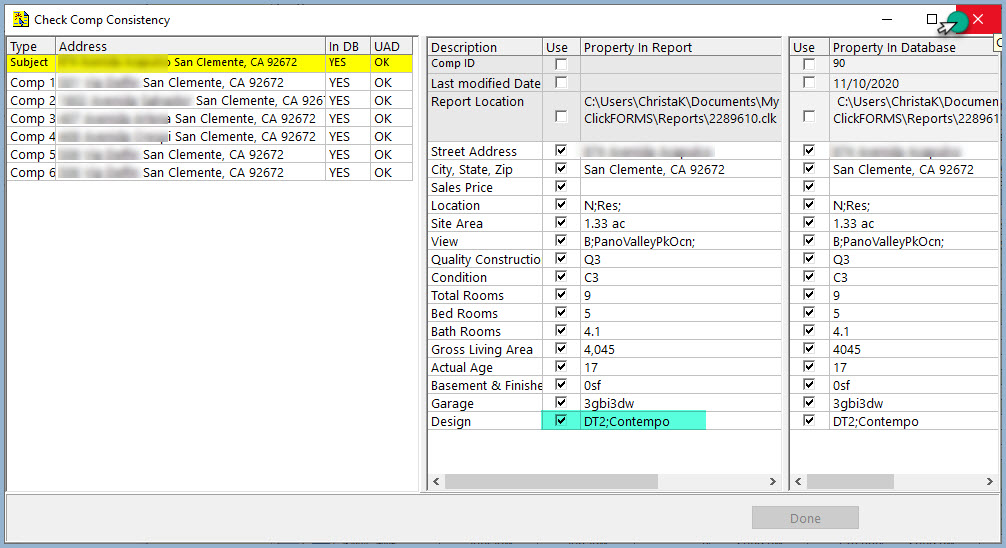
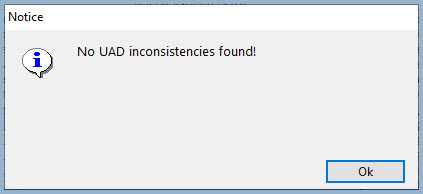
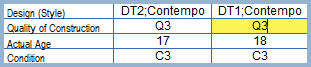
- The Comps Consistency Checker saves your selection. Click the "X" in the upper right corner of the window, then click "OK" from the popup window
|
 |
 |
|
|
Select Delivery Method and Recipient
|
-
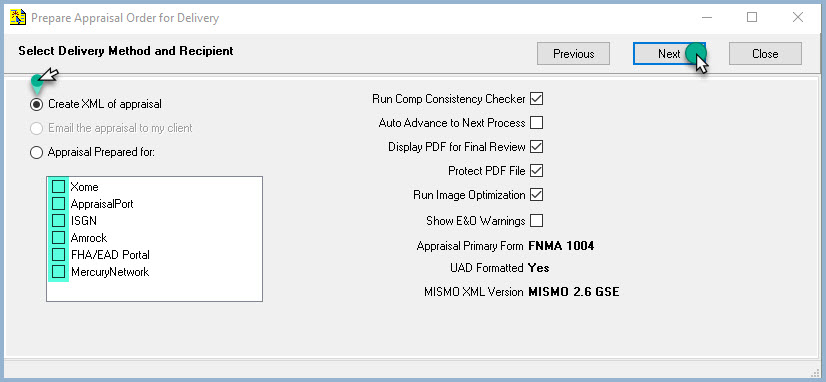
By default, the Create XML of appraisal radio button will be selected. If sending your report to a vendor, Select the Appraisal Prepared for radio button, then check the box of the recipeient. Check the appropriate boxes from the right column to customize the XML generation process.
|
 |
|
|
Specify the Appraisal Package Contents
|
-
For UAD reports, the options below are pre-selected. For MISMO reports, check the appropriate boxes for your appraisal package, then click the "Next" button.
|
 |
|
|
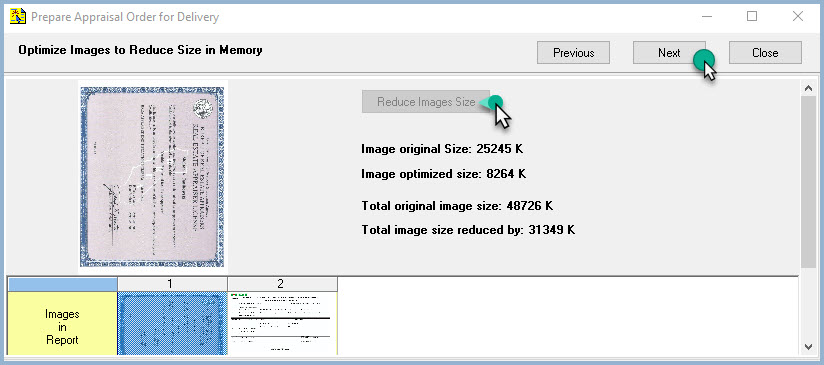
Optimize Images to Reduce the Memory Size in your Report
|
-
To reduce the total file size of your report, click the "Reduce Images Size" button, then click the "Next" button.
|
 |
|
|
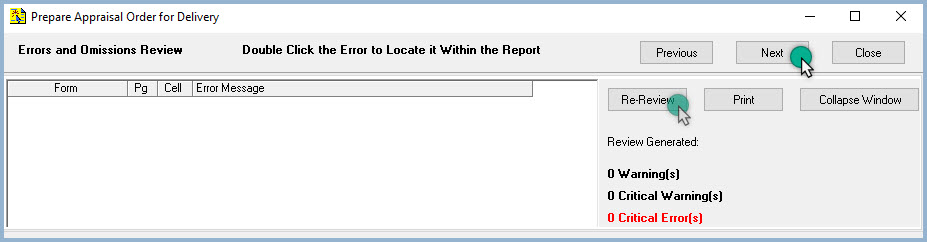
Errors and Omissions Review
|
-
Double-Click each error to correct in report. When Double-Clicked, ClickFORMS will take you directly to the error in your report.
|
 |
-
Make your corrections in your report, then click the Re-Review button from the "Errors and Omissions Review" window to clear the errors, then click the Next button.
|
 |
|
|
|
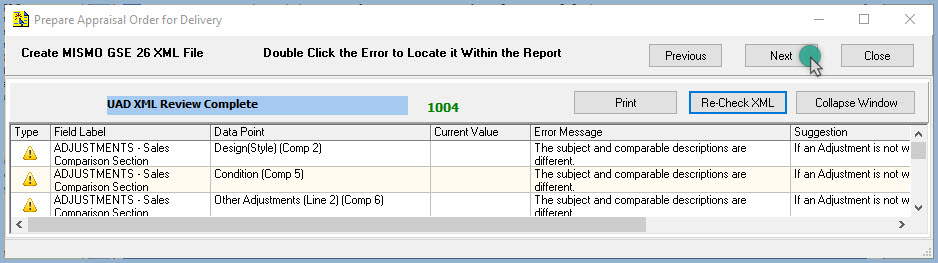
Create MISMO GSE 26 XML File
|
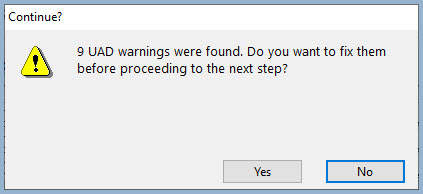
- If you decide to make further corrections, follow the same steps as above for Errors and Omissions Review, then Click the "Next" button. If you decide that your report is correct 'As-Is', Click the "Next" button, then click "No" from the Continue? pop-up window.
|
 |
 |
|
|
The PDF File of Appraisal Report
|
- ClickFORMS will automatically create the PDF for you. Click the "Next" to proceed.
|
 |
|
|
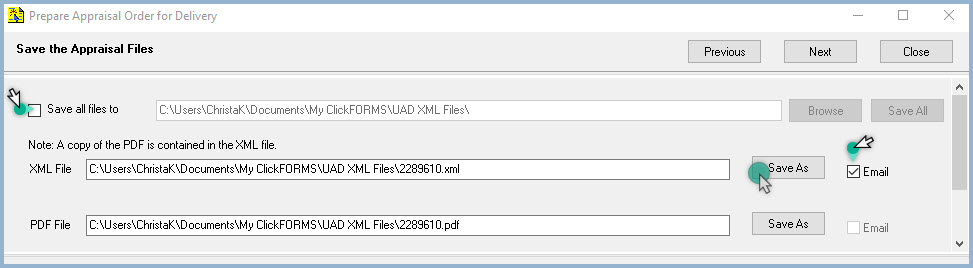
Saving your XML and PDF Report
|
- To Save all files (XML & PDF) to the same directory on your PC, click the "Save all files to" checkbox, then click Browse to choose a location. The location chosen will now be the default location for all future saved XML and PDF files. Next time, simply click the Save All button. The example below shows how to save your XML and PDF files in two separate locations on your PC.
|
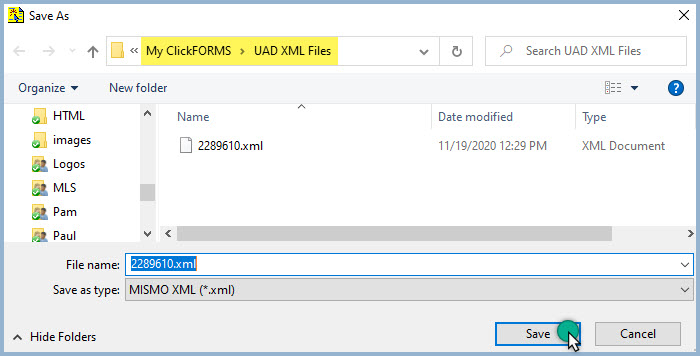
| To save the XML and PDF file in separate locations, make sure the box "Save all file to" is unchecked. Check the "Email" box for XML File, then click the "Save As" button. Choose a location to save your XML file. The example below shows the XML file being saved to: Documents\My ClickFORMS\UAD XML Files. Repeat these steps for the PDF file.
|
 |
 |
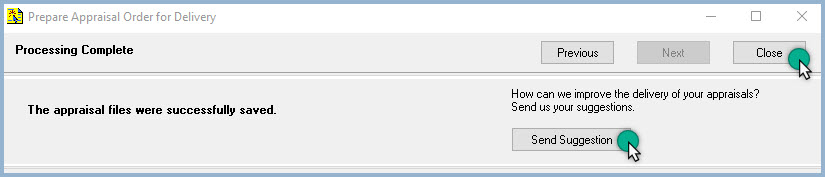
- If you have clicked the "Next" button from the "Save the Appraisal Files" window, the Processing Complete window appears. Feel free to send us a suggestion or click the "Close" button.
|
 |