| ClickFORMS's Image Optimization process that will automatically optimize photos when they are inserted into your report. The default for this is set to reduce the photo size to Medium quality. However, sometimes this will leave files still too large for some people's preferences. You can adjust the default Image Optimization setting by going to Edit → Preferences in ClickFORMS. |
 |
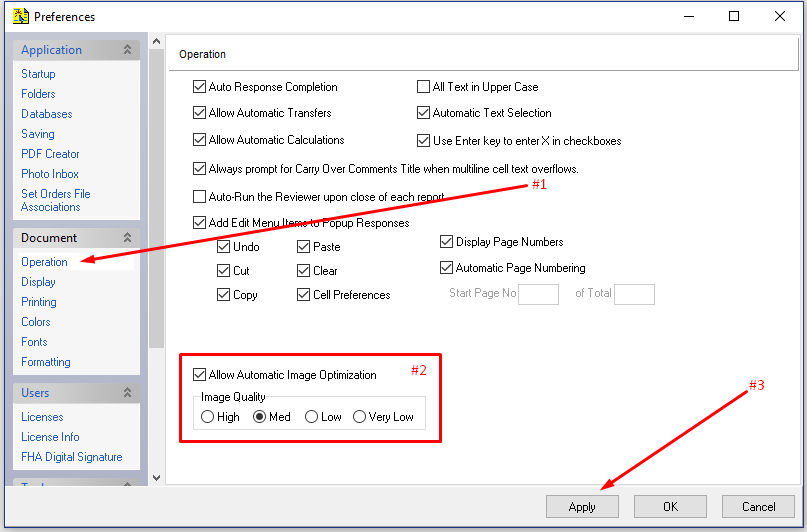
| With the Preferences menu opened, you will need to navigate using the Left side pane and find Operation. After selecting Operation, the menu options on the right side of the window will update. At the bottom of the newly populated options you will see Allow Automatic Image Optimization followed by Image Quality. You will want to select your desired quality then click Apply in the bottom right of the window. |
 |
| From this window, with the extended view checked, you can click directly into any of the comparable data cells and make changes as necessary. If you wish to undo the changes to the data you've made, you can click Undo or press Ok to save any changes you've made into the report. |
| Once the changes have been applied, all new reports will have your desired image quality settings when inserting photos. Image optimization is a balance between the quality and number of images and the final size of the report file generated. Now you can easily control those settings to efficiently produce reports with the highest quality images without exceeding size limits. |