CoreLogic | CoreLogic | SwiftEstimator® Cost Analysis User Guide
Before using the CoreLogic | SwiftEstimator Cost Analysis tool, be sure to start a report with a File number and your subject property's information.
- In ClickFORMS there are two different ways to launch the CoreLogic | SwiftEstimator Service.
Option 1: From the main ClickFORMS menu click on Services, then select Cost Analysis.
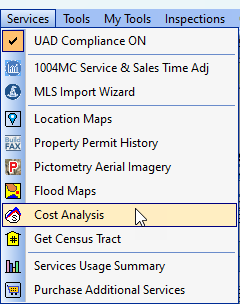
Option 2: If you have the "Workflow Toolbar" (View → Show Workflow Toolbar) visible, simply click the Cost Analysis icon.

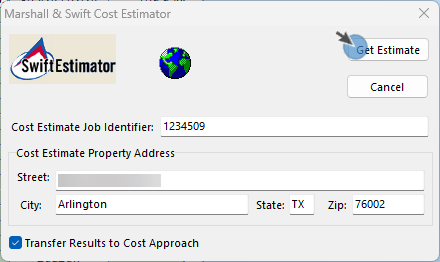
- In the CoreLogic | SwiftEstimator pop-up window, your ClickFORMS File number will be used as the "Cost Estimate Job Identifier" so you can edit the analysis later.
Click the Get Estimate button to begin.
- You will start at the "General Information" section. Verify the prefilled data and add any relevant data.
Proceed to the next section by clicking the link in the left column or by clicking the navigational button at the bottom right.
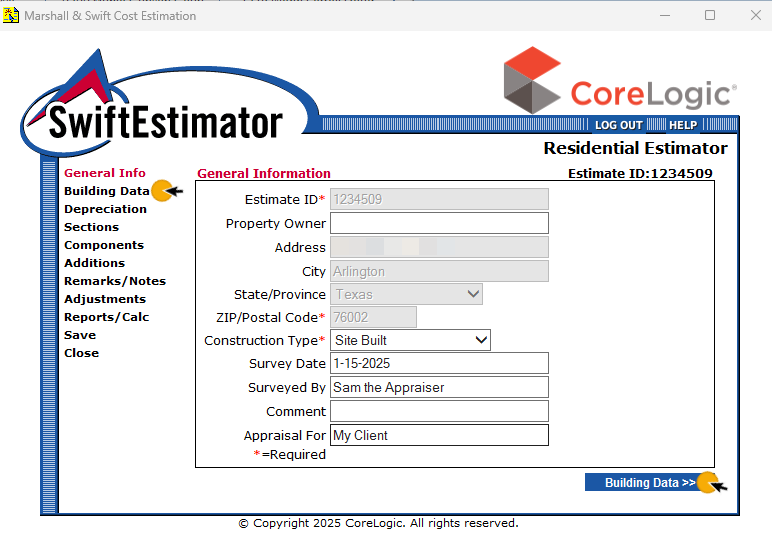
- Continue clicking through the sections and filling out your subject property's information until you reach the "Reports/Calc" section. Make sure to fill in any required fields noted by *.
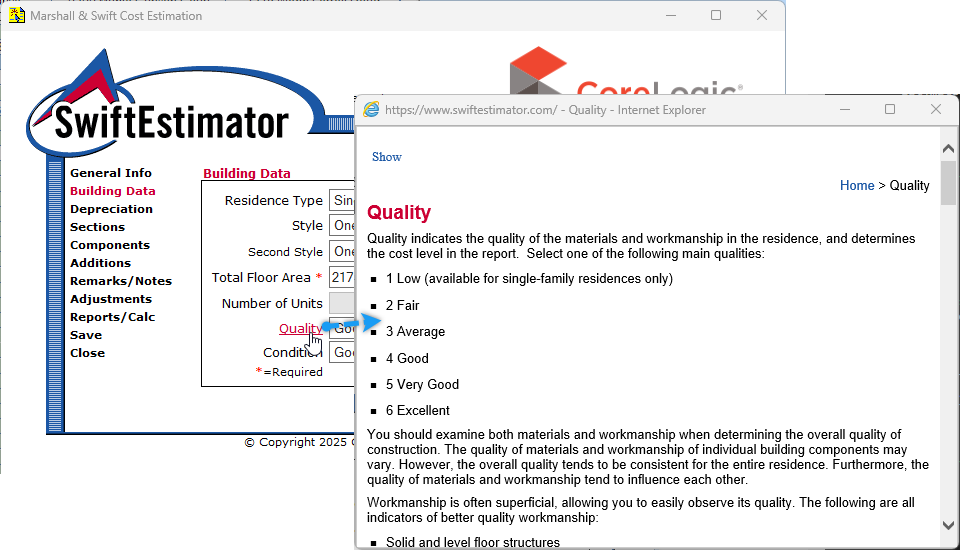
Tip: you can click on most field titles to get its description. Hover over the description's link until it turns red and click to get its definition details.
- Once you reach the "Reports/Calc" section, click the "Calculate" button.
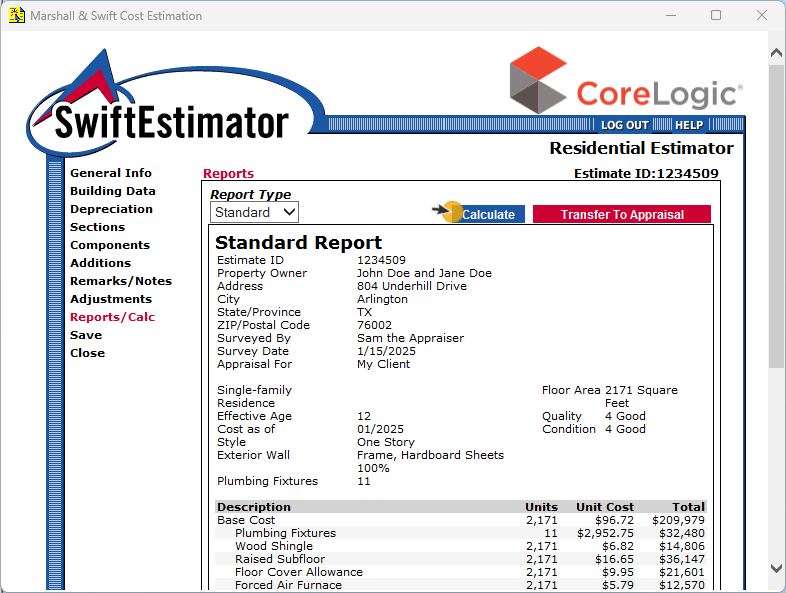
- Click the "Transfer to Appraisal" button to insert the cost analysis into your report.

- Your "Marshall & Swift Cost Analysis" addendum is added to your appraisal report.
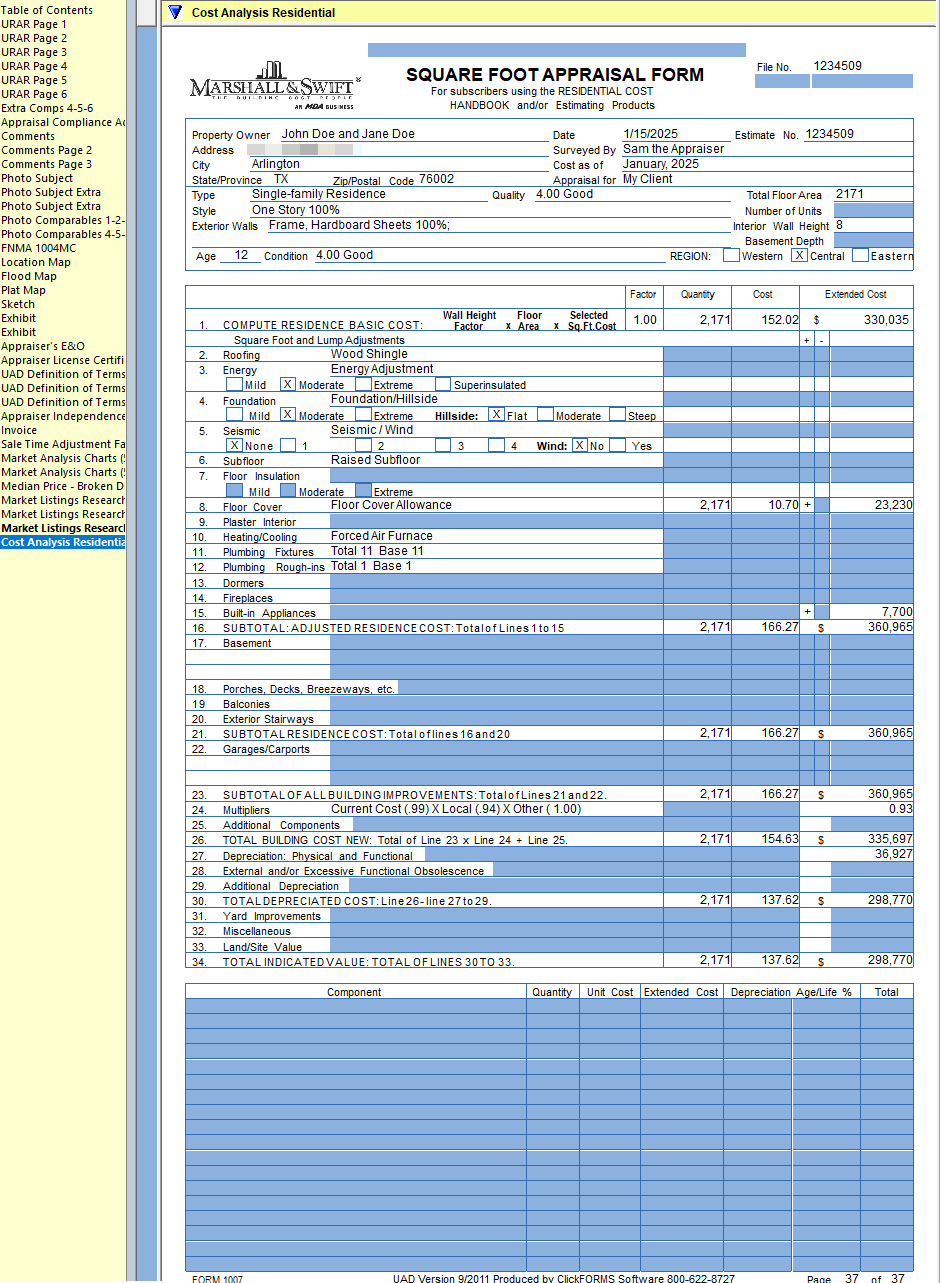
Please note: The screenshot below was created with minimal subject property data.